Overview of Primary Admin Settings
Role: Primary Admin
Benefits:
- Customization: Customize the look and feel of the LMS (branding, logos, colors) to match your organization’s identity and make the system more user-friendly.
- Complete Control and Flexibility: Primary Admins have full control over user roles, permissions, and settings, making it easy to manage and oversee the entire LMS environment
- Improved Efficiency: Streamline administrative tasks such as user management, course assignments, and notifications, saving time and enhancing productivity.
Functionality Breakdown: Below are some of the different functionalities that you will see within your settings that you can control as a primary admin to customize your LMS system.
Organization Settings:
1. Organization Information: This setting allows you to manage and update essential details about your organization, such as its name, address, and contact information. Keeping this information accurate and current is crucial for ensuring smooth communication. Below are the mandatory details required:
- Company Name: Add Company Name
- Help & Support email: This email will be shared with learners and included in all email notifications they receive.
- Help & Support Message: Provide information on how learners can get assistance and where to find resources.
2. Branding: This setting allows you to customize your platform’s visual elements, including the logo, favicon, title page, theme, login background, and alignment. By tailoring these elements, you create a cohesive and branded user experience, enhancing brand recognition and ensuring that the platform aligns with your organization's visual identity and style.
3. Banners: You have the ability to design banners that feature and promote specific content on the LMS. These banners will be prominently visible to all learners on their ''Homepage and Training Page''.
Once you click "Add Banner," you can configure it by:
- Selecting Content Type: Choose the type of content to feature, such as a course, path, event, forum, or post on the LXP.
- Selecting Content: Pick the specific content you want to highlight.
- Page to Feature On: Decide where the banner will be displayed on the homepage or the training page.
- Upload Image: Once you are done with the first 2 steps shared above, you will get the option to upload the banner [MAX 2MB].
- Tracking on Homepage & Training page Banner, You will be able to track: This data will be visible on the banner setting page.
Views: How many unique users who have seen the banner.
Clicks: Unique users who have clicked on the banner.
CTR %: Percentage of users who have clicked on the banner among those who have seen it.
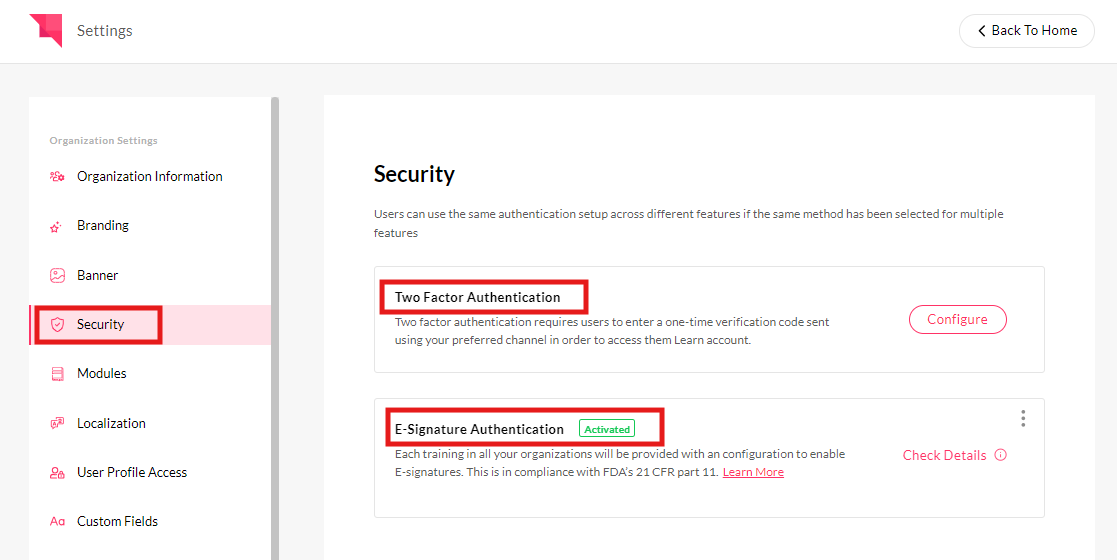
4. Security: Admins can setup two factor authentication and eSignature authentication. Once enabled, the users can use the same authentication setup across different features if the same method has been selected for multiple features.

- Two factor authentication: If this is configured, the users requires to enter a one-time verification code sent using your preferred channel in order to access them Learn account. You can choose one of the authentication methods to activate 2-factor authentication for all the users in your organization including yourself.
Email OTP: Users will receive OTP on their email.
Authenticator App: Users will get OTP in the authenticator app (Microsoft Authenticator, Authy, etc.) once they configure the app on their device.
- E-Signature Authentication: Once activated, trainings will have a configuration to require E-signatures from learners. In compliance with FDA's 21 CFR Part 11, learners and admins will be required to authenticate themselves when they complete such a training or edit the learning content of such a training. Admin can choose the mode of authentication as well for the users such as:
Email OTP: Users will receive OTP on their email.
Authenticator App: Users will get OTP in the authenticator app (Microsoft Authenticator, Authy, etc.) once they configure the app on their device.
Username and Password: Users will be required to enter their username and password.
5. Modules: To activate any new modules added to the LMS, you may enable them from this section. Once you enable these, it will be under the respective tabs on the LMS.

Learning Center:
- Mentorship: The Mentorship module in an LMS is a coaching component that helps employees grow by connecting them with experienced mentors. It allows users to create and manage mentorship programs, helping employees develop skills faster, improve job satisfaction, build future leaders, and enhance performance through personalized guidance and feedback.
- Tasks: Tasks in Auzmor Learn are a powerful tool that creates an interactive learning experience. Learners can use it in many ways, including planning their tasks/observational checklists by adding subtasks, customizing response types, requesting reviews from other users, and more
Trainings:
- Surveys: Primary admins of each organization can activate surveys for their respective organizations. Once activated, other admins can incorporate surveys into learning paths and use the tool to collect detailed feedback from users assigned to or enrolled in those paths.
- Training Feedback: Once enabled and configured, The Admins will have the ability to capture ratings and reviews by users for each training in all branches.
Engagement:
- Social Learning: This module lets learners interact and collaborate with each other. It includes features like discussion boards, group activities, and peer feedback. Learners can ask questions or view general threads on topics like people, products, feedback, and more, helping them share ideas and learn from one another.
- Announcement: Once this module is enabled the admins can use this to broadcast important updates to all learners at once.
6. Localization: Localization provides you the flexibility to control default system language and time zones.
- Default Language: You need to set the language preference for all users in the LMS and would be updated due to this selection.
**Users can change their language preferences.
- Select Time zone: It will be applied to all users who will be added to the LMS.
**Users can change their language preferences.
**Users can change their language preferences.
7. User Profile Access: You can control if a user can view/edit their profile.
- View Access: You can enable & disable the view access from the settings.
- Edit Access: You can enable & disable the edit access from the settings.
8. Custom Field: You may add custom fields for User profile, Paths , Courses, External Trainings and for Mentorship Program once enabled it will be visible in the respective pages.
9. Ownership: You can always come & transfer your organization ownership to any one in the organization. You need to click on transfer ownership and raise a request to Auzmor.
10. Branches: You can enable multiple branches in our main environment. To do this, you need to submit a request to Auzmor. Once the branches are enabled in the Auzmor backend, you will see them reflected in the settings. After that, you’ll be able to create branches in the LMS.
11. SSO: To enable single sign-on (SSO) in the LMS, primary admins have the option to configure it on the LMS once it has been set up on the listed provider portal.
12. Marketplace: You may enable the below from the Marketplace from the options listed in each section in the LMS:
- Authoring Tool Knowbly: A user-friendly platform for creating and managing online learning content.
- HRIS (Human Resource Information System): Software for managing employee data and HR functions.
- Web Conferencing: Tools for virtual meetings and collaborative online sessions. In Auzmor LMS you can integrate with Zoom, GoTo Meetings, GoTo Webinar, GoTo Trainings , Microsoft Teams etc.
- RMS (Records Management System): A system for managing and tracking records and documents within your organization.
- Custom Apps: Tailored applications to meet specific organizational needs.
13. e-Commerce: To enable e-commerce on your platform, you'll need to submit a request to Auzmor for backend activation. After they enable it, you’ll have the option to activate the feature by adding your payment details, public URL, and support information.
14. Webhooks: You have the option to integrate Webhooks to the LMS. A webhook in an LMS allows for real-time communication between the system and other applications, automating tasks like course completion notifications and user management updates
Account Settings:
1. User Profile: You may setup your user profile by filling the details.
1. User Profile: You may setup your user profile by filling the details.
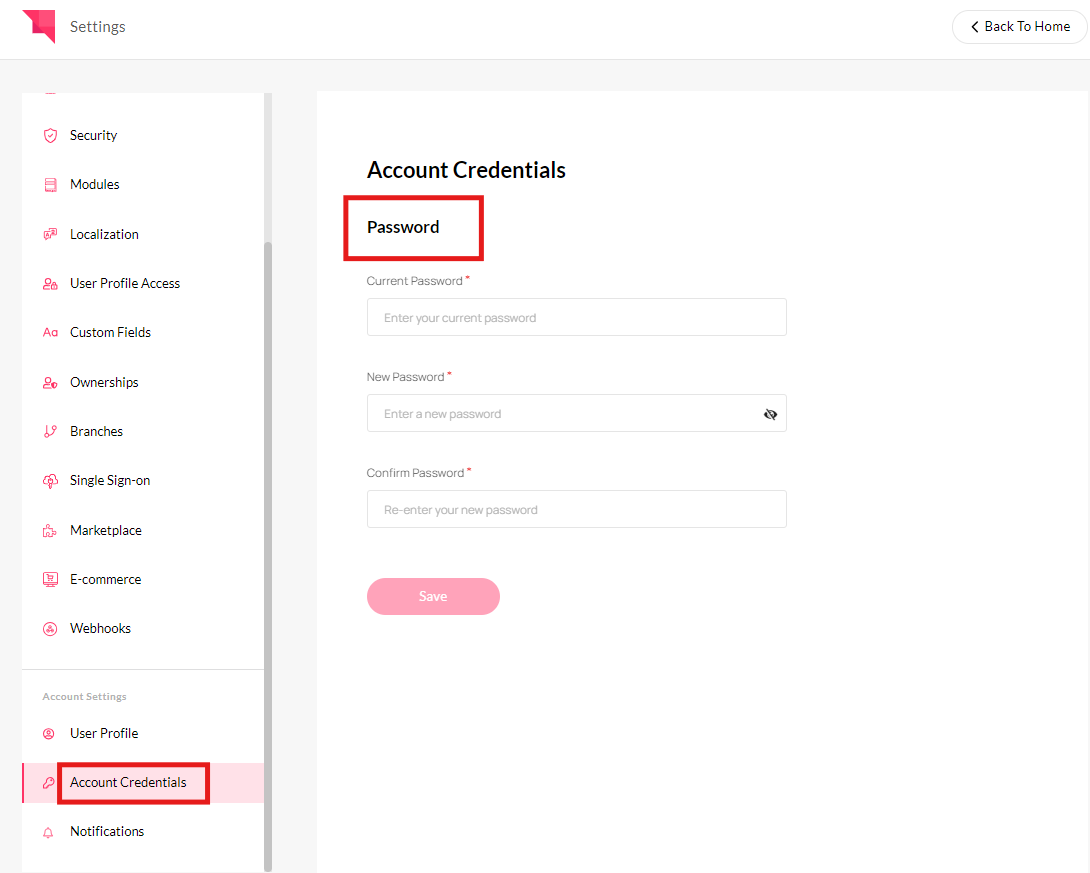
2. Account Credentials: If you need to reset your password, you can do so here.

3. Notifications: Primary admins can set up and manage In app & Email notifications from the Notifications section.

Related Articles
Course Visibility Settings Overview
Course Visibility Settings Overview With the help of the ‘Course Settings’ option, you can view the course setting criteria that have been assigned to a course once the course is published or is in the drafts. ‘Course Expiration’ allows you to set a ...Course Settings Overview
Course Settings Overview With the help of the ‘Course Settings’ option, you can fine-tune the courses to make them as self-sufficient as possible. ‘Course Expiration’ allows you to set a timeline for which the course stays live. After the expiration ...Courses Overview
Role: Admin Description: This article will give a high-level overview of the courses section. It provides admins and managers with the tools to manage course content, track learner progress, and ensure courses align with training objectives. ...Home screen overview
Home screen overview Auzmor's home screen is designed to give a high-level view of all crucial modules, it is also designed in a way that drives better usability. Note: This is only visible to Admins. The Home screen is very easy to navigate, here ...Learning Path Settings
Learning Path Settings Settings are a powerful way to ensure efficient completion of training. This option is available for administrators. For Administrators Following are the different settings that can be used when creating a learning path: Path ...