Creating Multi-Session Events In Auzmor Learn
Role: Admins
Description: In this article, admins will learn how to create, manage, and track multisession events in Auzmor Learn.
Benefits:
Streamlined Scheduling: Admins can organize multiple related sessions under a single event, reducing the need for repetitive scheduling and simplifying management.
Simplified Enrollment: Learners enroll once for the entire event, automatically gaining access to all associated sessions without needing to register for each one individually.
Focused Instructor Management: Instructors are only assigned to and responsible for specific sessions, avoiding confusion over unrelated content or schedules.
Clear Completion Tracking: Learner completion is automatically tracked based on attendance to required sessions, ensuring consistency in training records and reports.
Step by Step Guide: You may refer to the screenshots below for a step-by-step guide on how to create the Multisession events in Auzmor Learn.
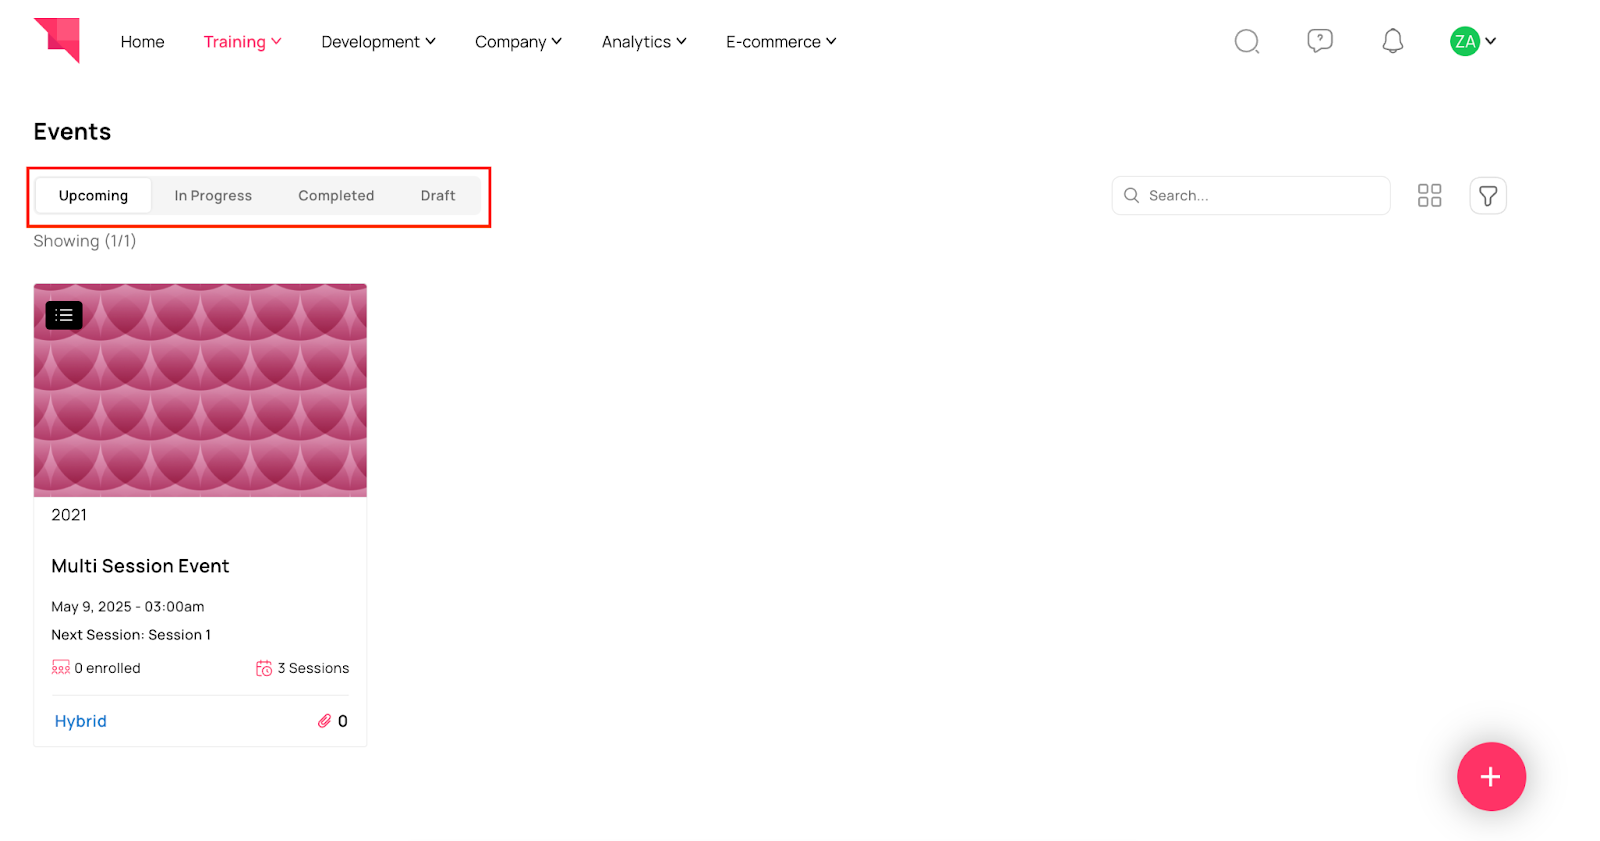
Step 1: Navigate to Trainings > Hover over the Events tab
Step 2: Once you click on the Events tab, admins will see the following options:

Upcoming Event: All the event sessions are scheduled to happen in the future.
In-progress: Events where one or more sessions have started or concluded, but the full event is not yet completed.
Completed: Events that have finished and all sessions are done.
Draft: Events that are still being created and not yet visible to learners.
Step 3: Click on the Add Button to Create a New Event
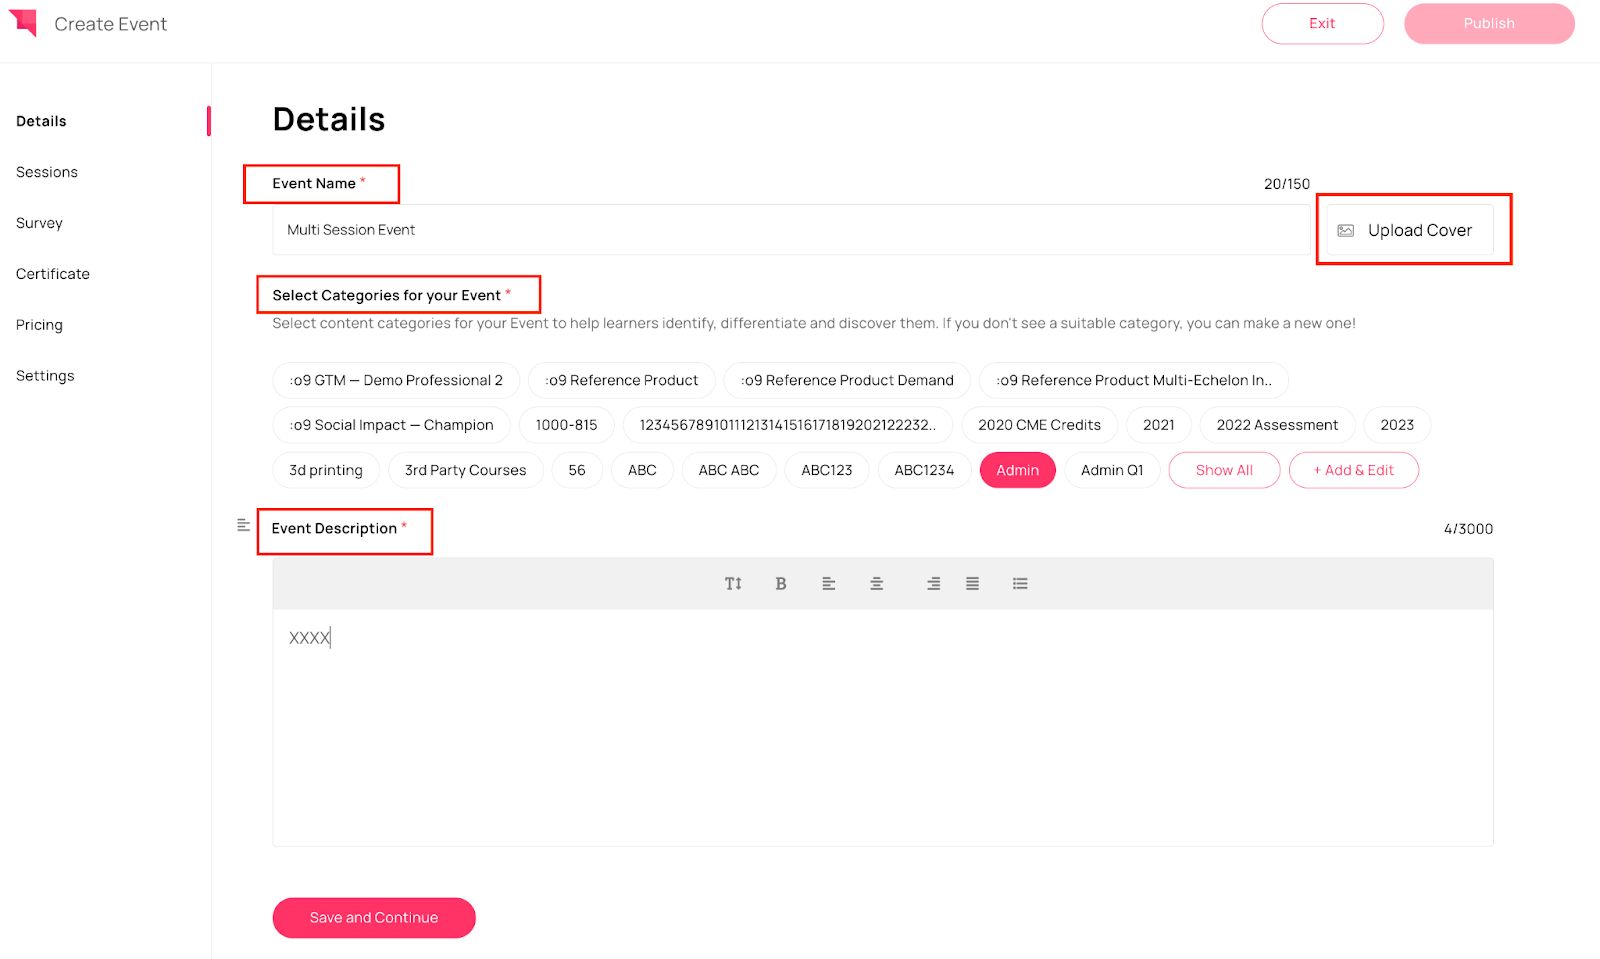
Step 4: Add Basic Event Details: Enter the event name, description, select event category, upload a cover image, and click Save & Continue.

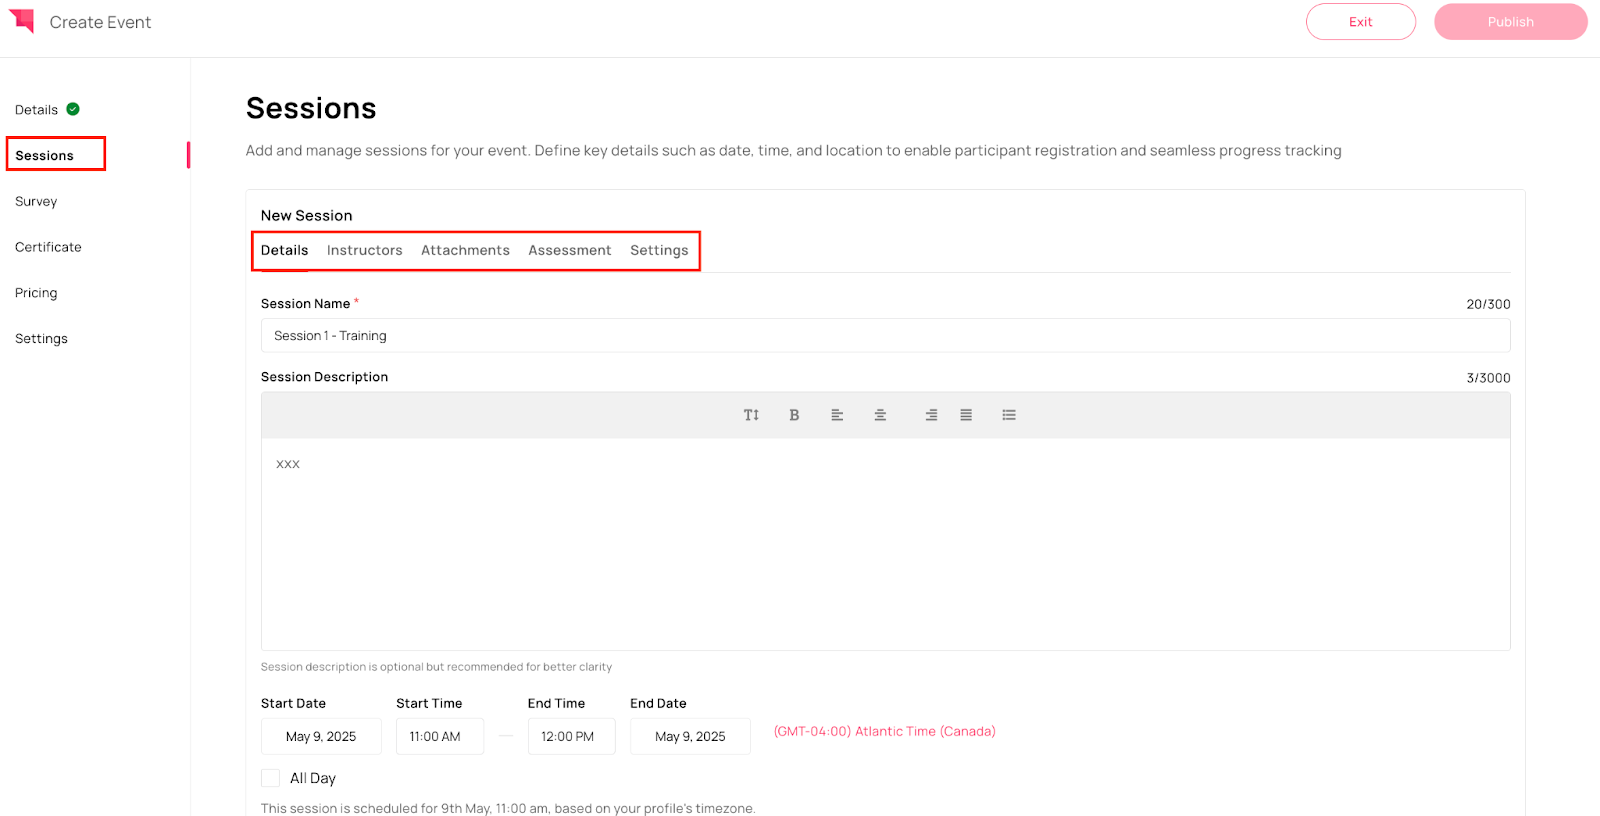
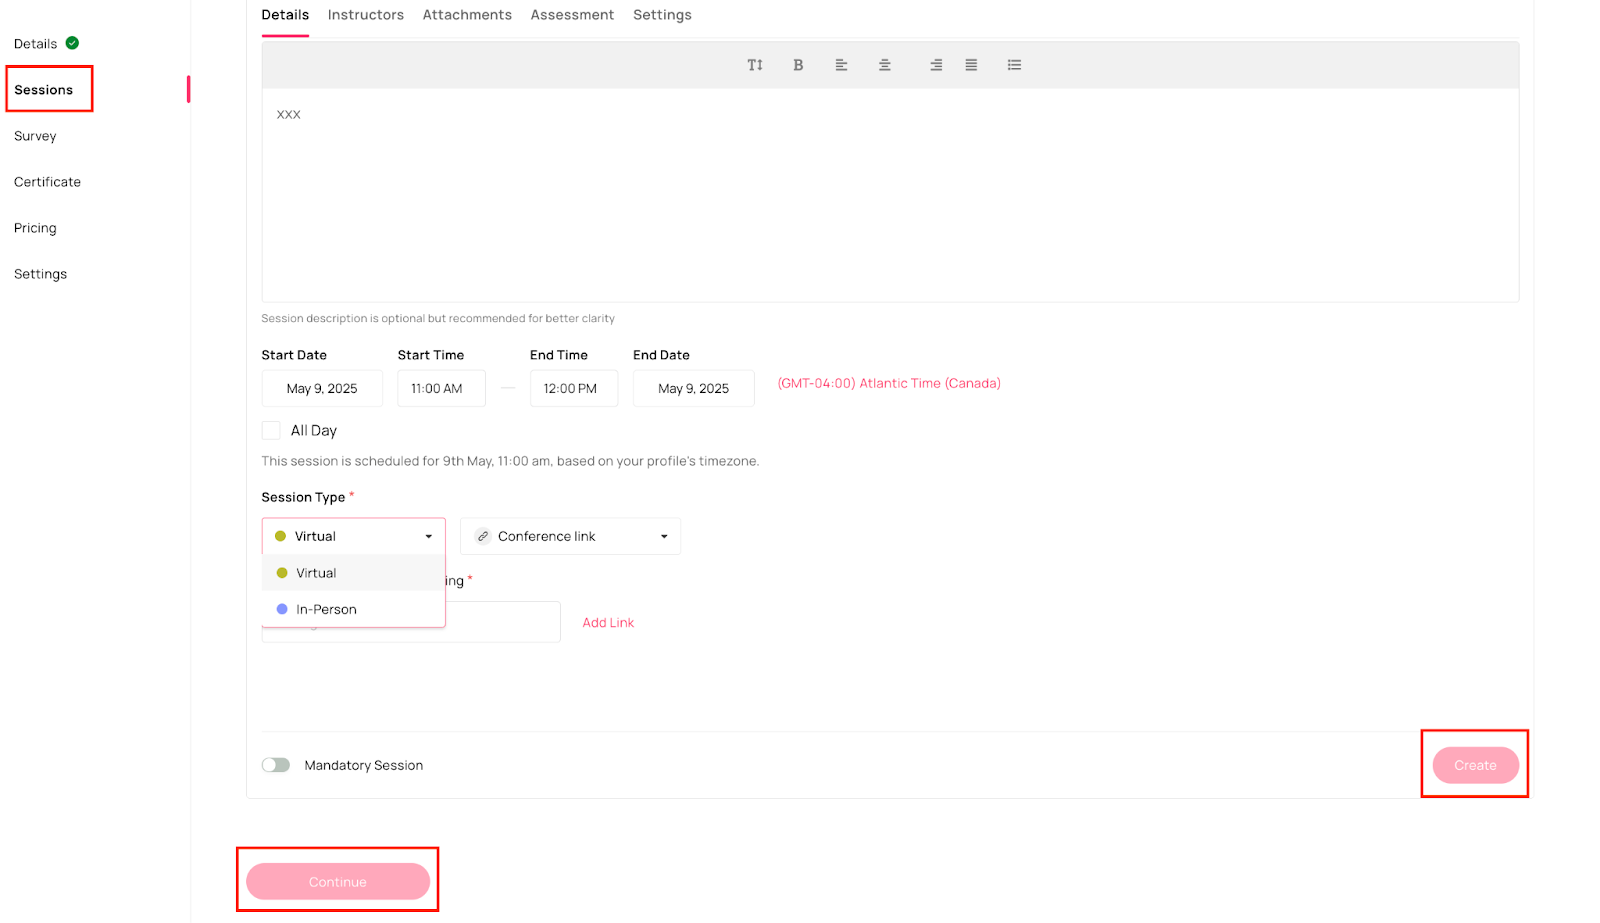
Step 5: Create Sessions Admins can create one or multiple sessions for any event type (Virtual or In-person) by entering the required details such as session name, description, date and time, event type, and whether the session is mandatory or optional.
Note: At least one session must be marked as mandatory to proceed
Once all the fields are added, click on save and continue.
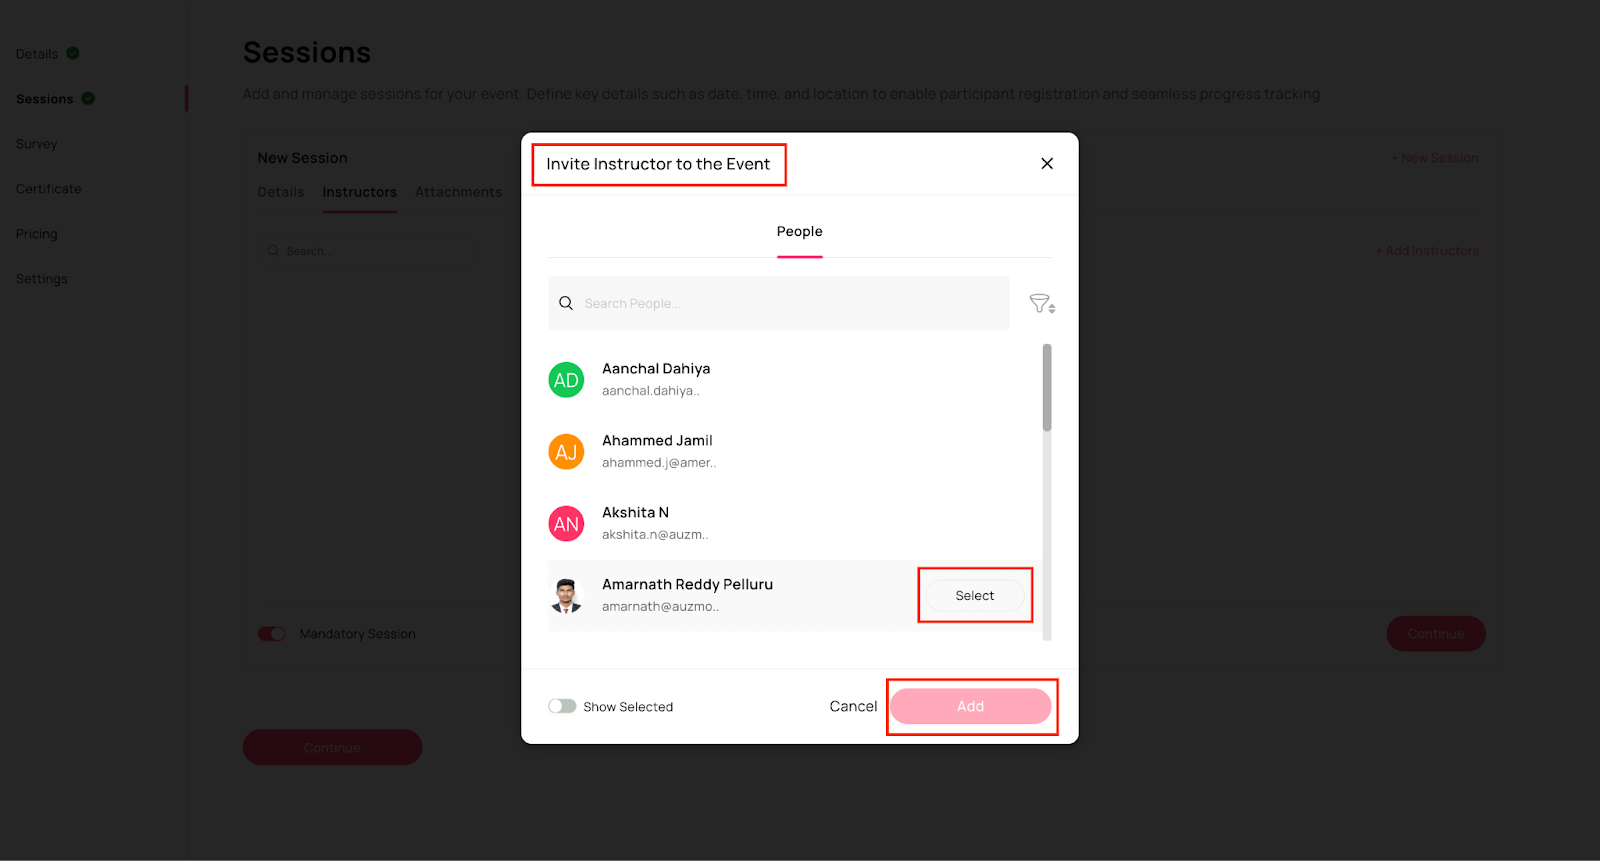
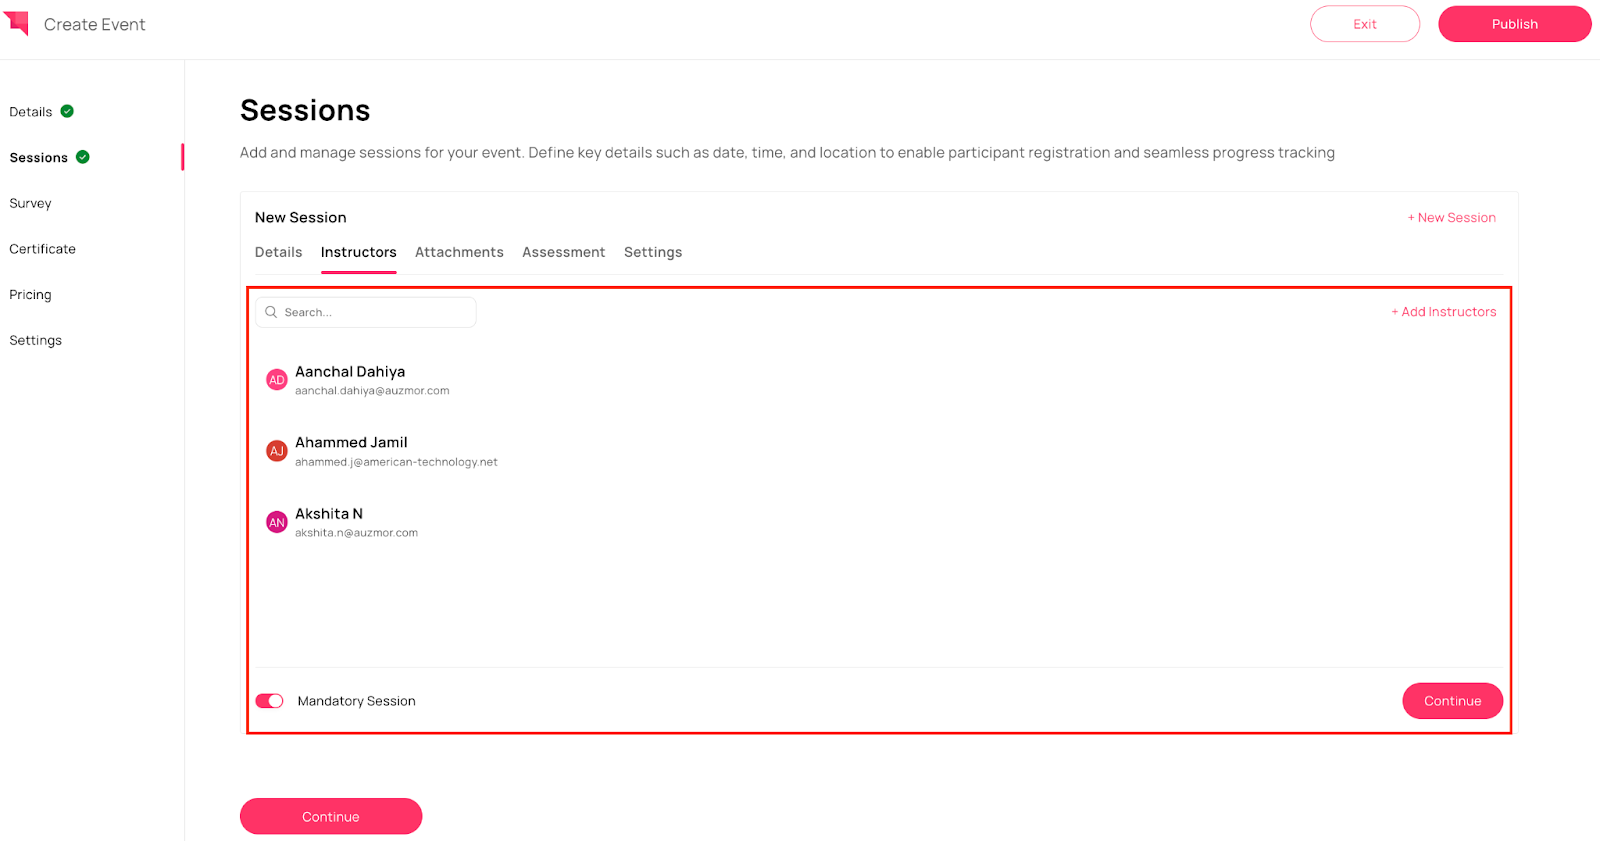
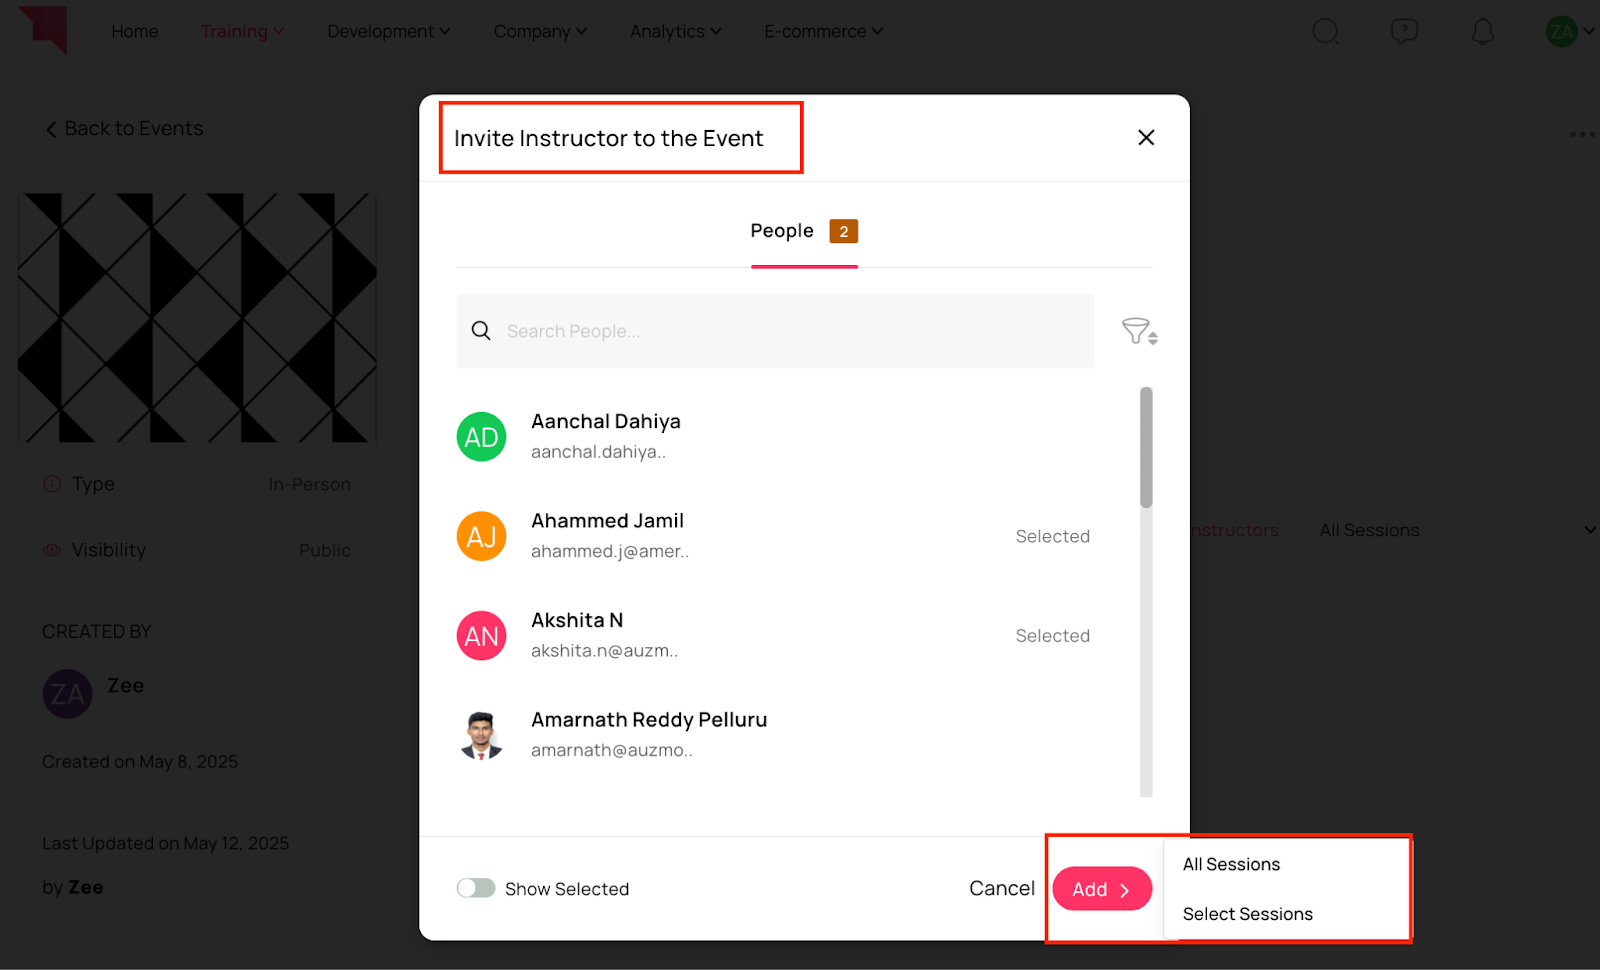
Step 6: Add Instructors Admins can assign one or multiple instructors to each session as needed.
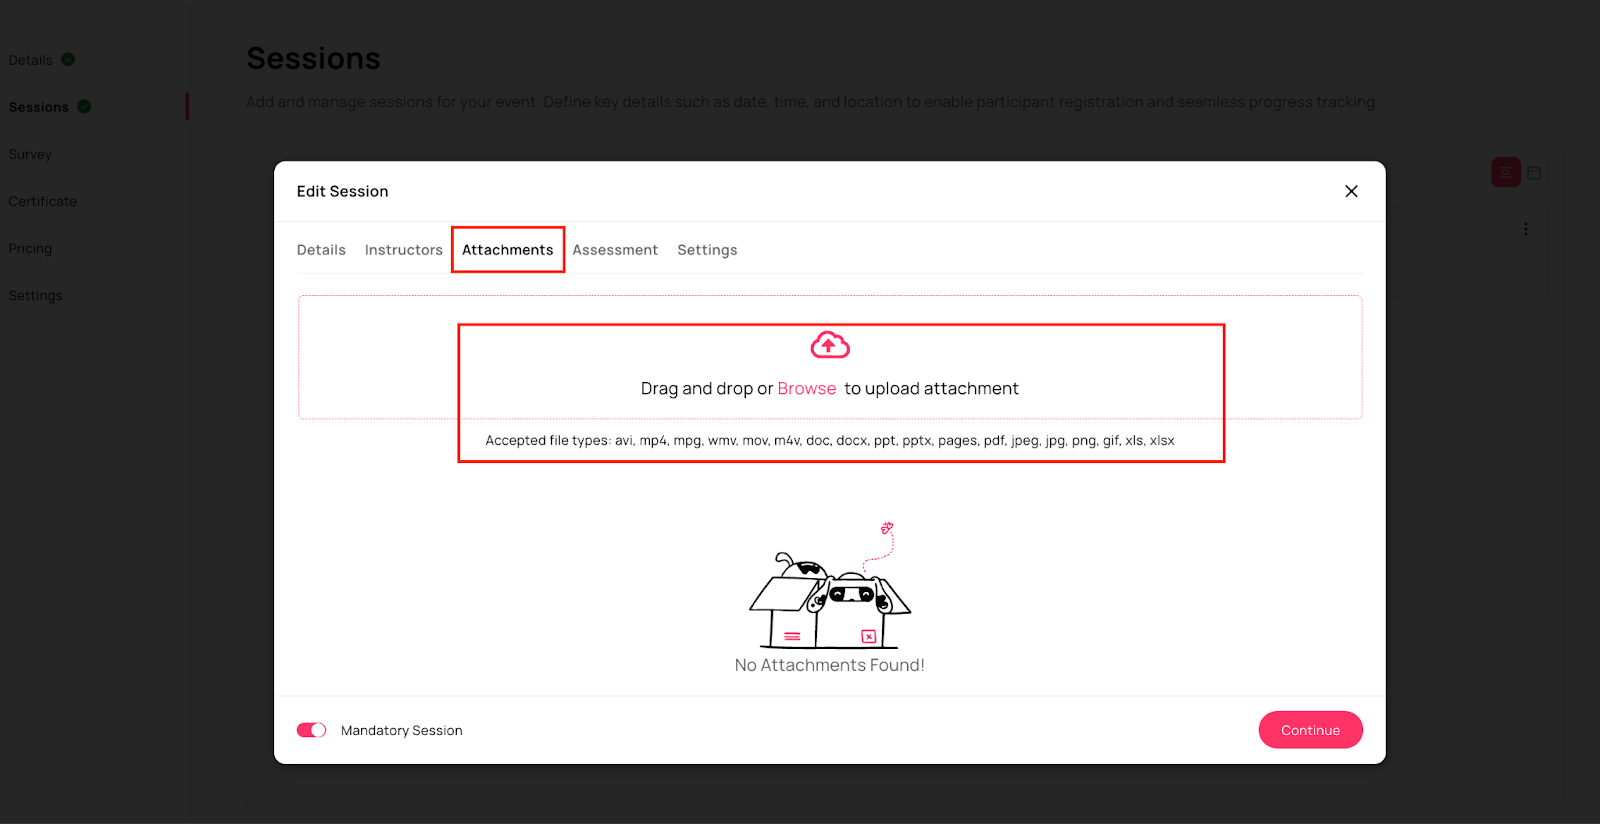
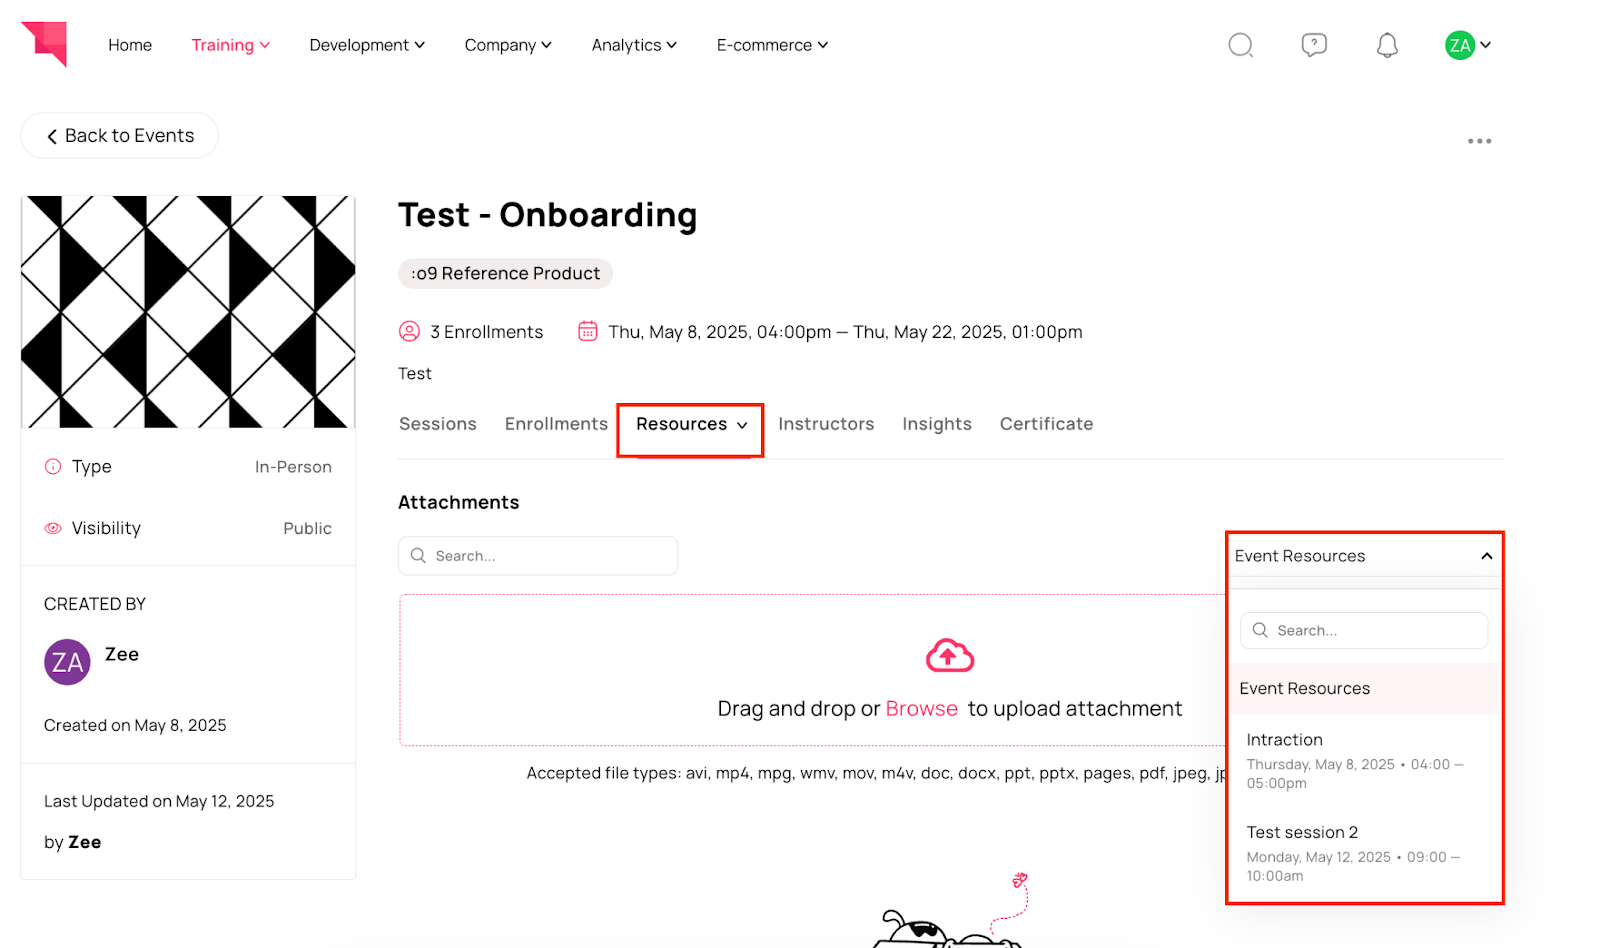
Step 7: Add Attachments Admins can attach relevant files related to the event or session.
Note: Accepted file types: avi, mp4, mpg, wmv, mov, m4v, doc, docx, ppt, pptx, pages, pdf, jpeg, jpg, png, gif, xls, xlsx
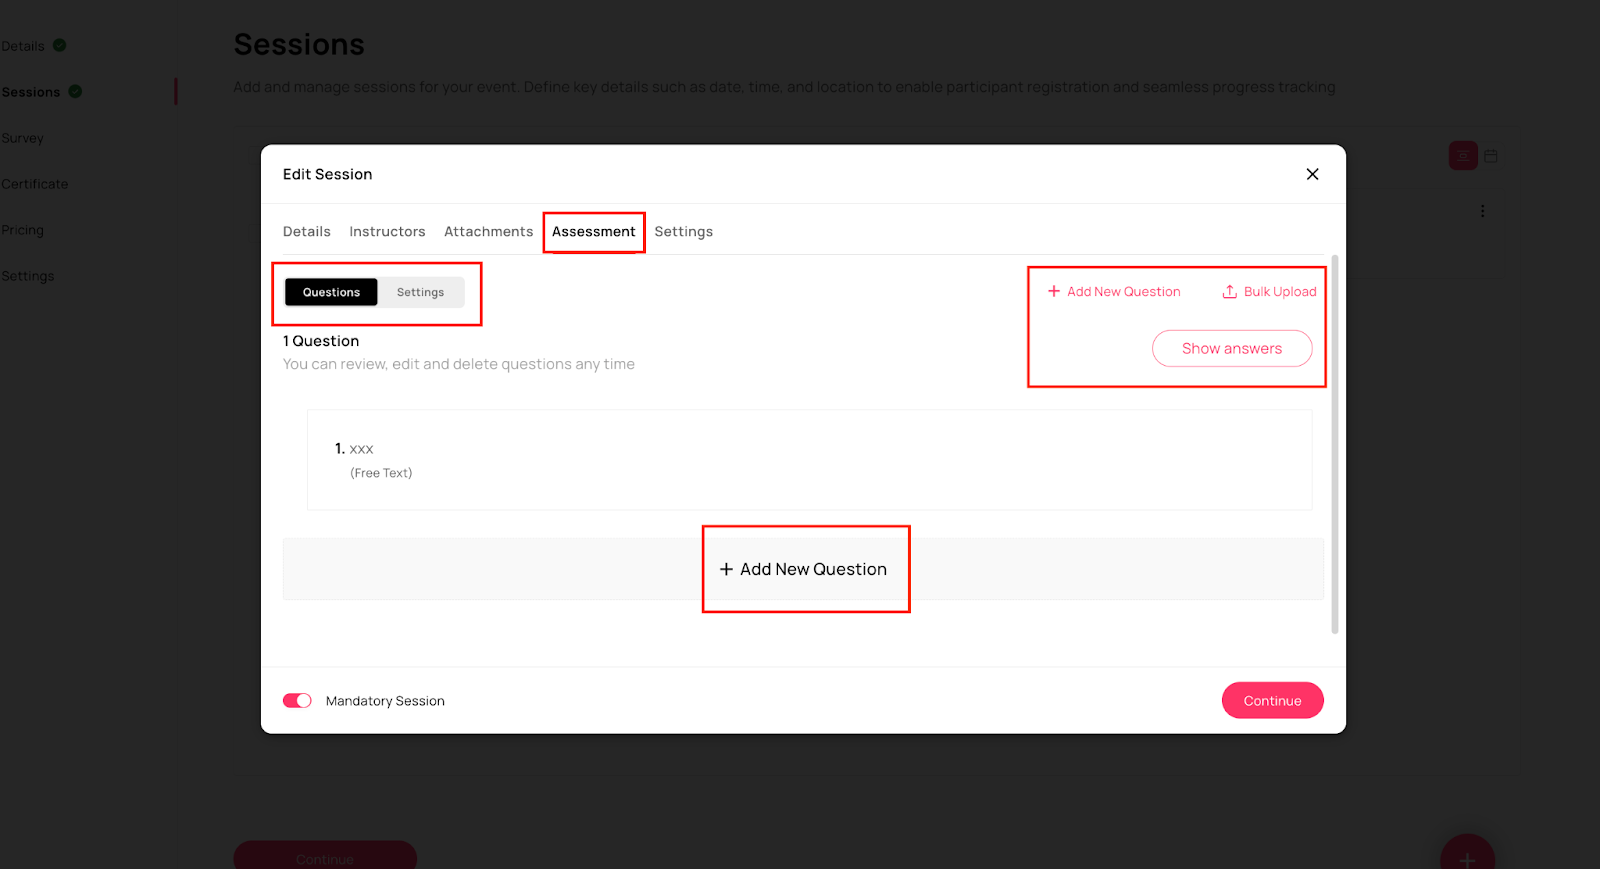
Step 8: Add Assessment Admins can add assessments to each event session, similar to how they are added in courses.
Note: All assessment options are the same as courses.
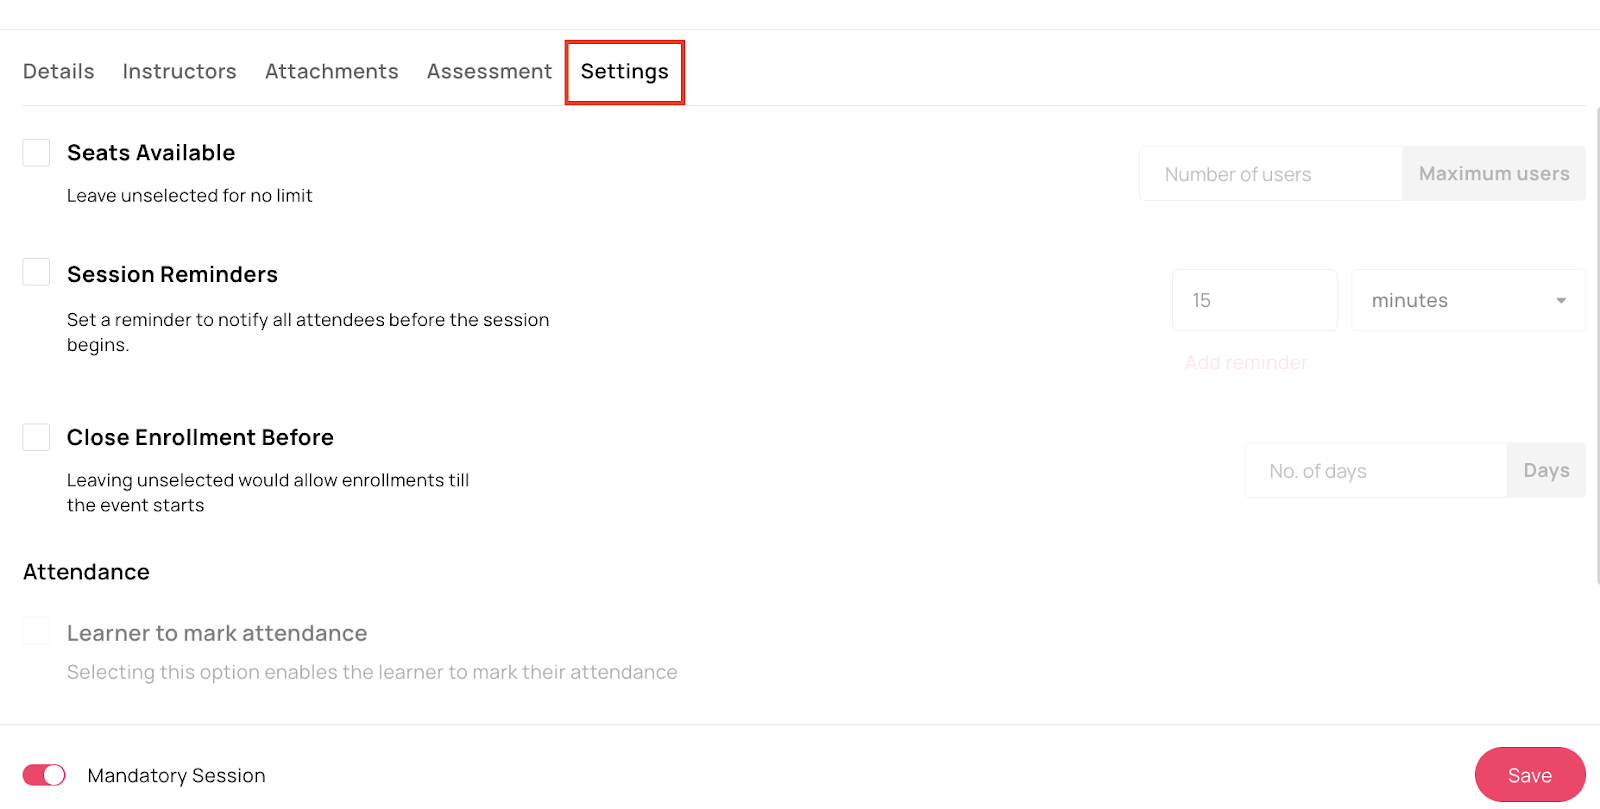
Step 9: Session Settings Admins can configure the following settings for the specific session.
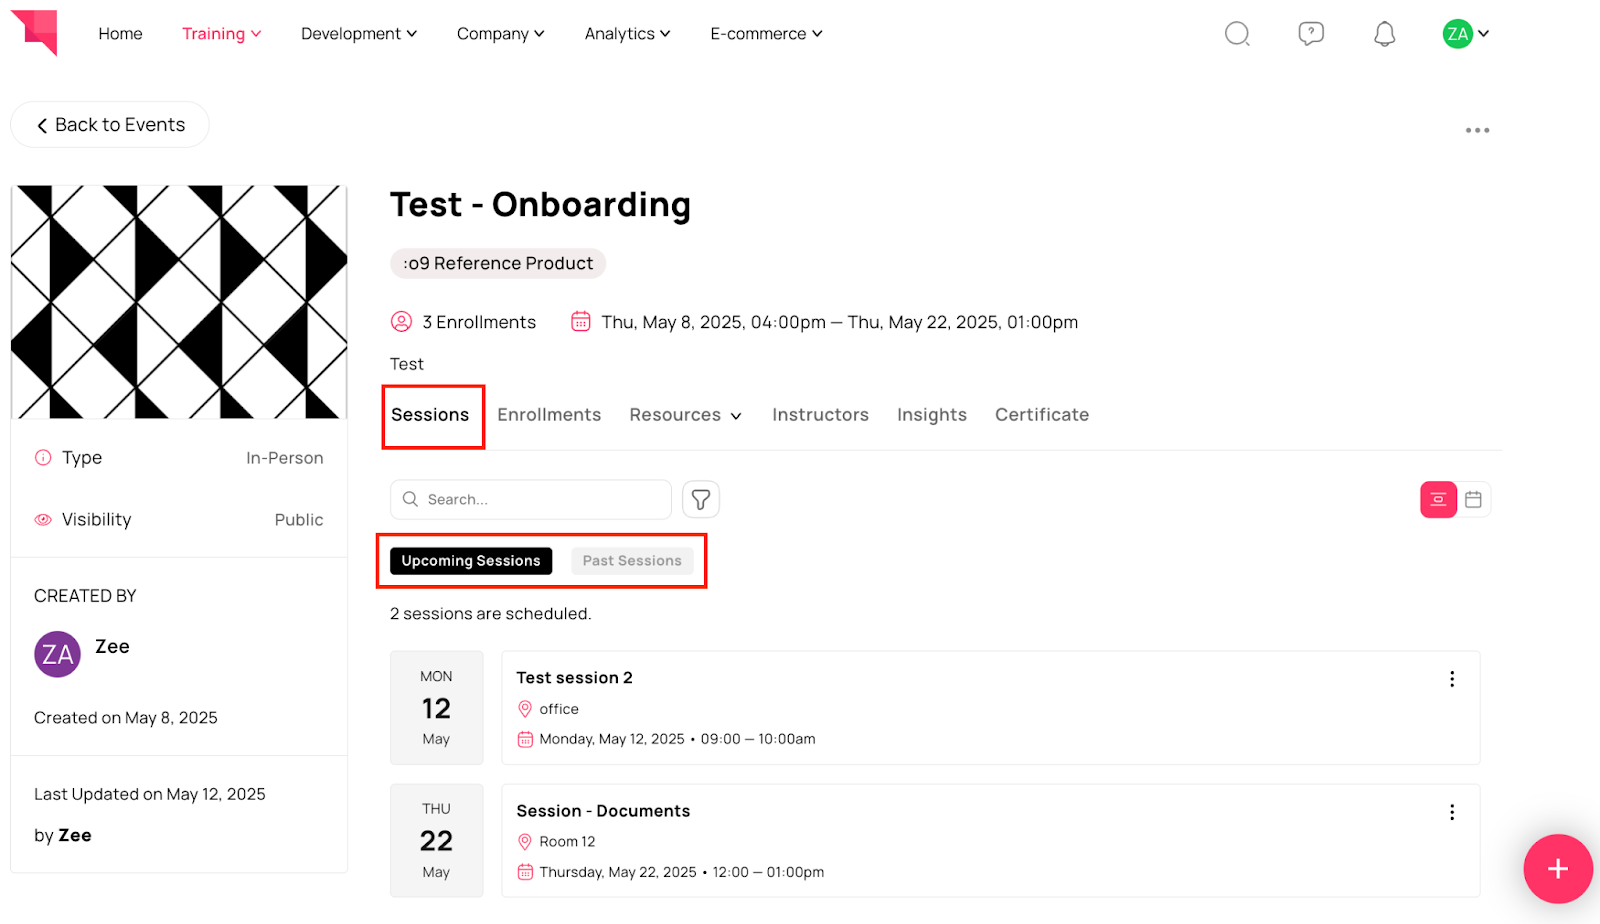
Step 10: View Sessions Once all the sessions are created, they will appear under the Sessions tab.
Here you will see two tabs:
Upcoming Sessions: Shows sessions that are either ongoing or scheduled for future dates.
Past Sessions: Shows sessions that have already been completed.
Note:
You can View these sessions in two views, List view as well as Calendar view.
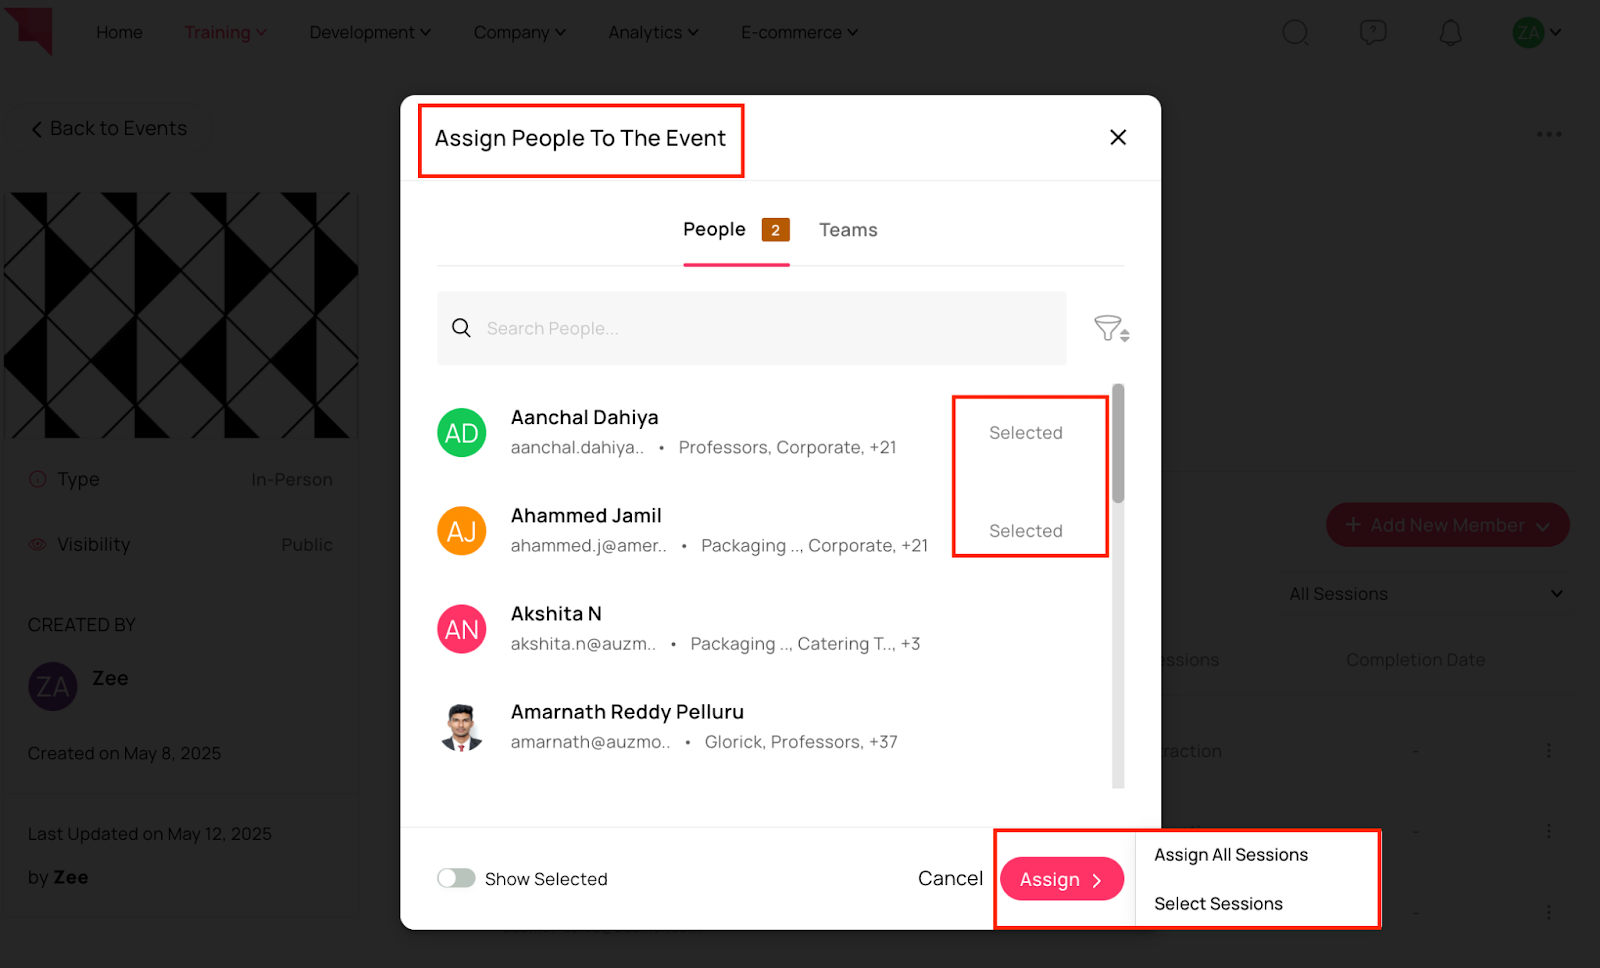
Step 11: Admin Actions Admins can manage the following either while creating individual sessions or from the respective Event Page by selecting the relevant sessions:
Enrollments: Add or remove participants for the selected sessions or all sessions.
Note:
1. Session-Level Enrollment: Learners are enrolled at the session level. All mandatory sessions are automatically assigned.
2. Completion Logic: Learners must attend all mandatory sessions to complete the event.
3. Optional Sessions: Can be included without impacting overall completion.Instructors: Assign or update instructors responsible for delivering the sessions.
Resources: Admin can choose and upload supporting materials such as documents, presentations, or reference links for the event or respective sessions.
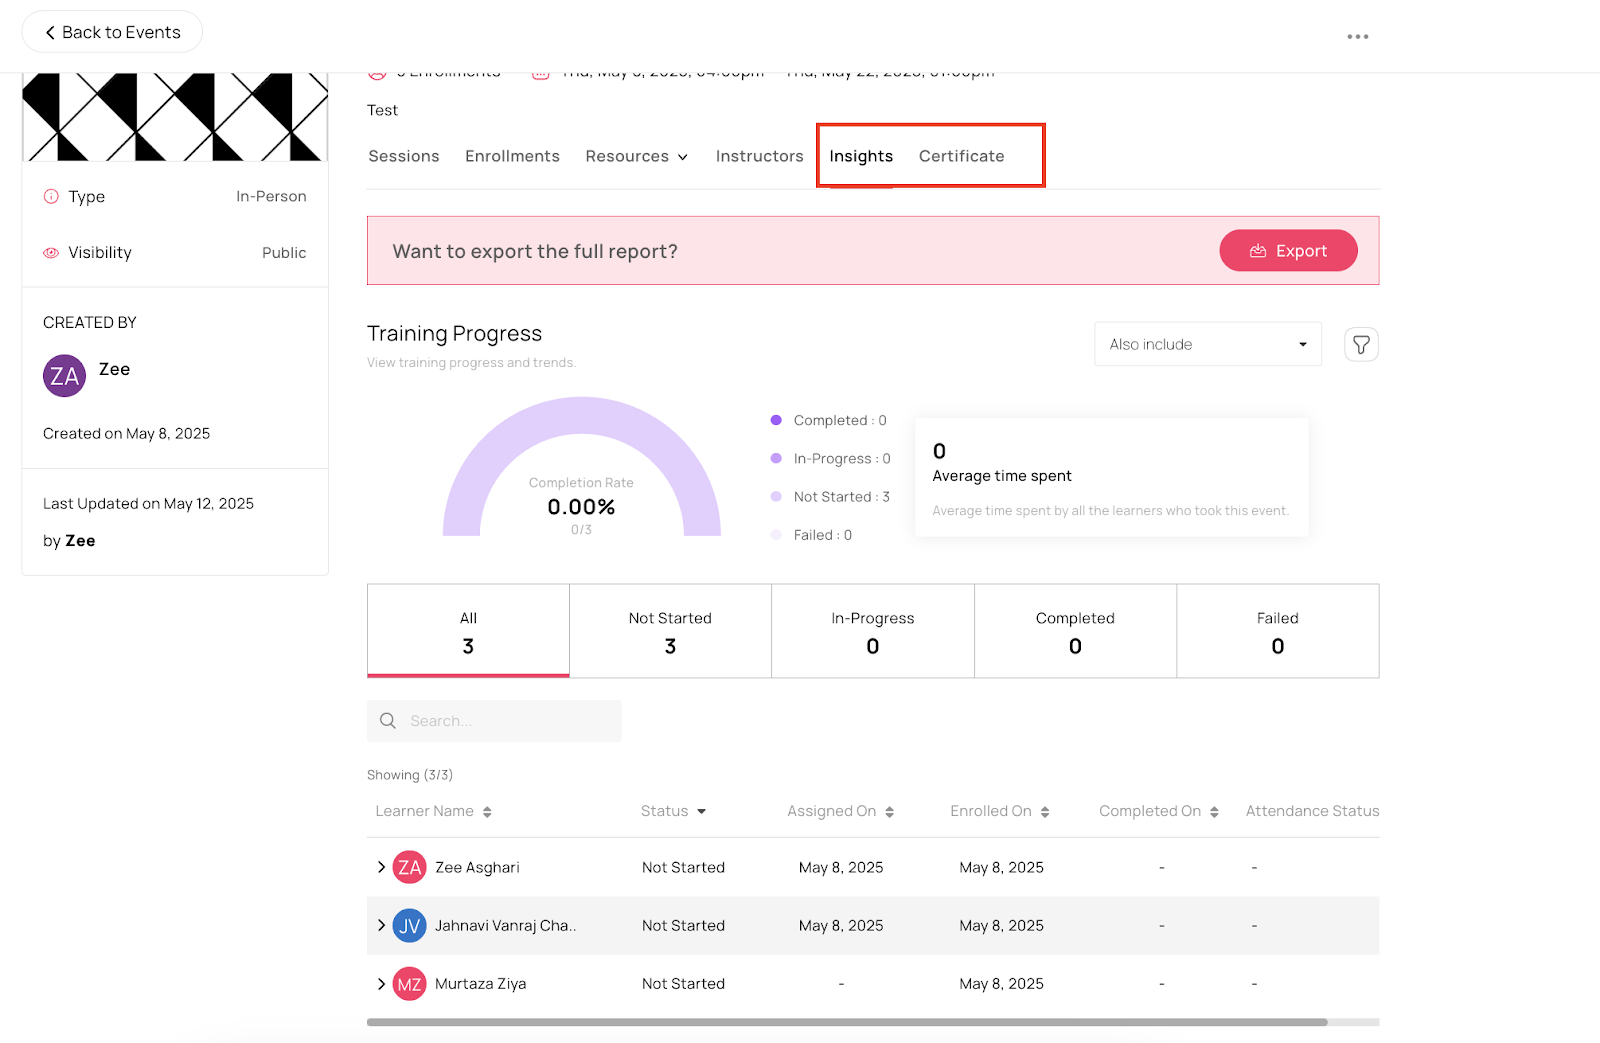
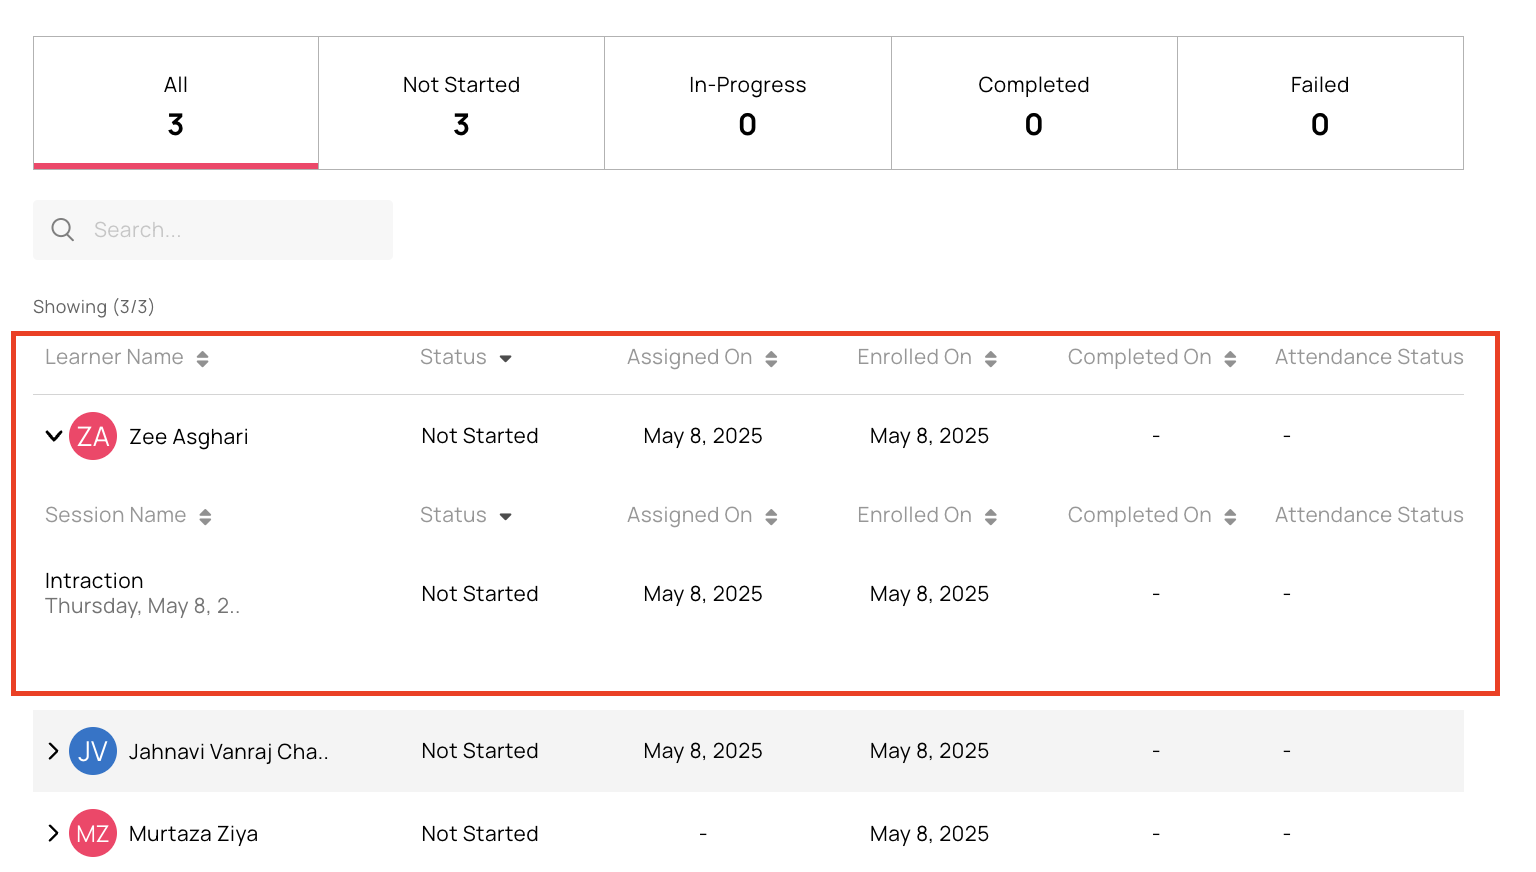
Step 12: Event Insights Admins can view event insights under the Insights Tab similar to Paths.
Note:
1. Session-Level Reporting: Includes attendance and learner participation.
2. Event- Level Metrics: Shows completion based on mandatory session attendance.
3. Historical Data Integrity: The completed records remain unchanged unless manually updated.
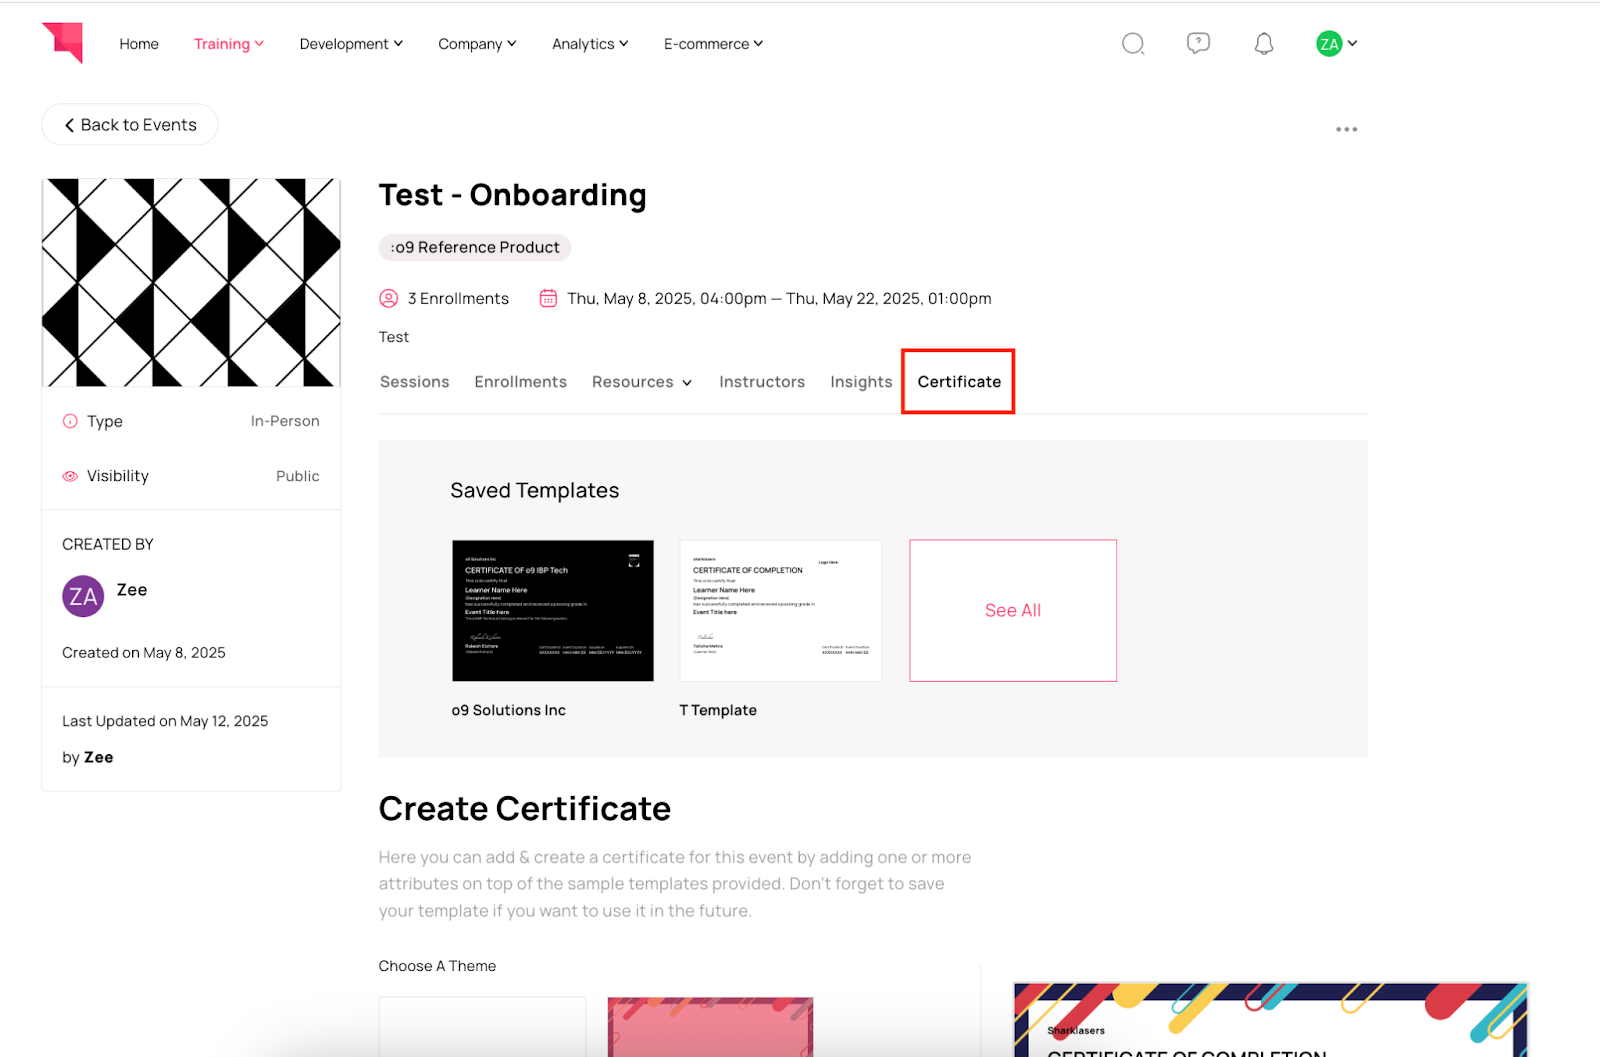
Step 13: Certificates Admins can also create certificates for events or use saved templates, similar to how they are created for Courses and Learning Paths.
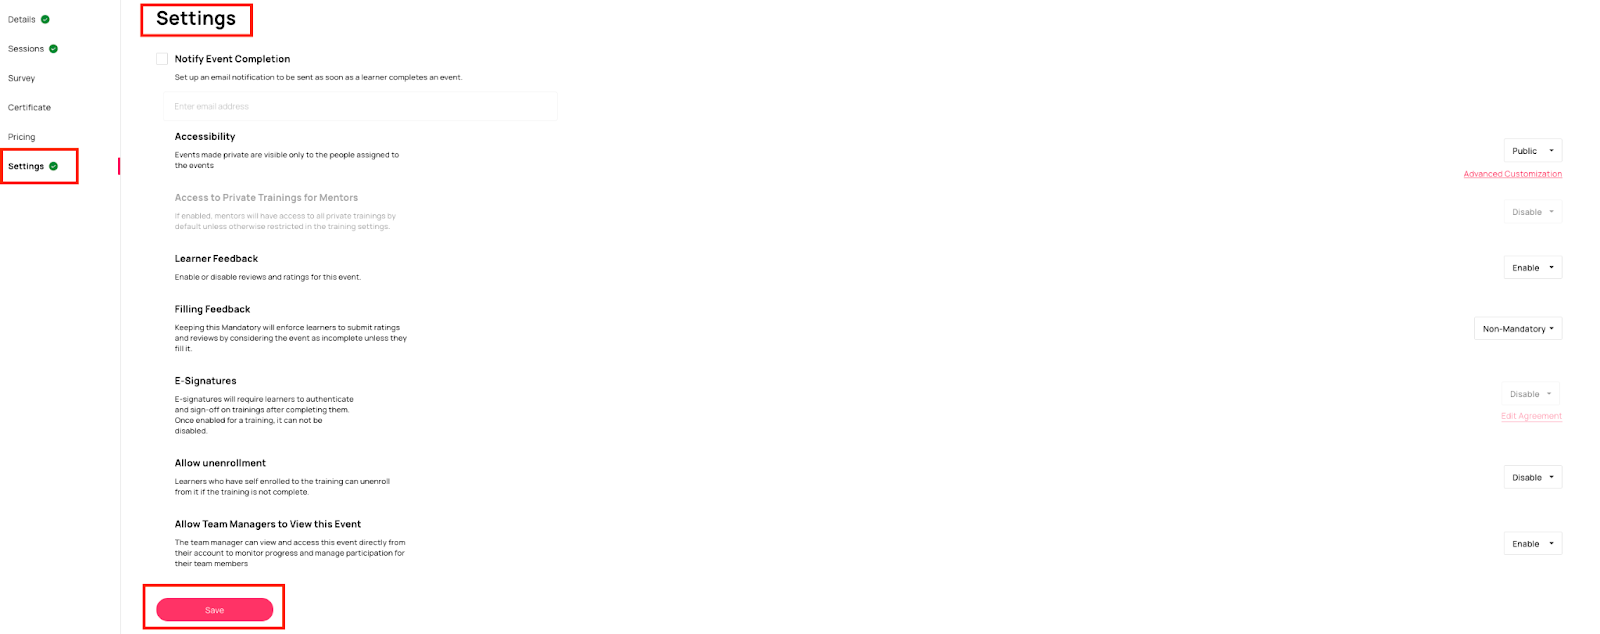
Step 14: Event Settings Admins can keep the event settings as needed.
Related Articles
Recurring Events in Auzmor Learn
Title: Recurring Events In Auzmor Learn. Description: In this article, admins will learn how to create recurring training sessions and efficiently manage session demand using the waitlist feature in Auzmor Learn. Benefits: Recurring Events: Automated ...Marking Attendance for In-Person Sessions/ Events in Auzmor Learn
Roles: Admins/Learners Description: In this article, you’ll learn how to mark attendance for in-person sessions in Auzmor Learn. Learners can mark their attendance by scanning a QR code, which redirects them to a screen where they can confirm their ...Custom Roles in Auzmor Learn
Description: This article provides an overview of Custom Roles in Auzmor Learn and explains how permissions can be configured to match your organization’s structure and access needs. Overview Custom Roles in Auzmor Learn allow organizations to define ...Outlook Calendar Integration In Auzmor Learn
Overview Auzmor Learn supports direct integration with Microsoft Outlook Calendar to simplify and automate scheduling for Instructor-Led Trainings (ILTs) or Events. When an event is created in Auzmor Learn, it automatically appears on the Outlook ...Certificates in Auzmor Learn
Roles: Admins, Managers, Learners Description: In this article, you’ll learn how certificates work in Auzmor Learn from creating certificate templates, attaching them to courses, reusing saved templates, and managing issued certificates for learners. ...